
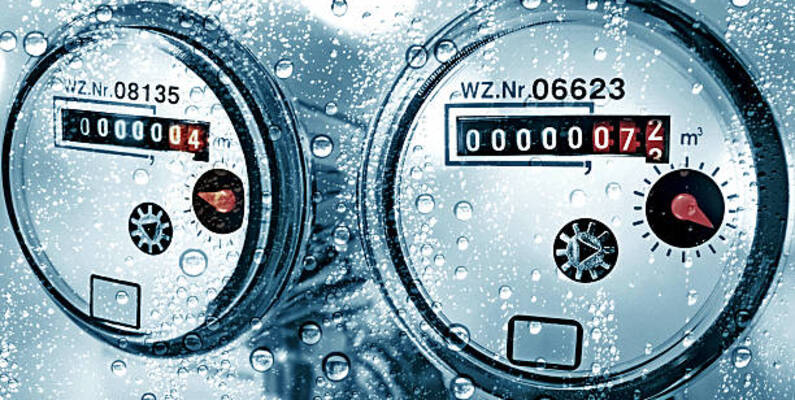
 Image from Kaggle.com
It started with a frustration I couldn’t shake.
Every month, someone from our local water utility walks house to house, squints at analog water meters—those spinning dials with tiny red numbers—and jots down readings on a clipboard. In 2026. While we’re talking about self-driving cars, generative AI, and satellites beaming internet from space, water meter reading still looks like it did in 1985.
I’m a software developer and I lead an ICT division in a government office here in the Philippines. I see inefficiencies like this everywhere. The difference this time? I actually decided to do something about it.
This is the story of how I built an AI-powered water meter reading app that runs entirely on a mobile phone—no cloud, no OCR, no server costs. Just a Flutter app, a custom-trained YOLO model, and a lot of trial and error.
Why OCR Was Never Going to Work
When I first sketched out this project on a whiteboard, the obvious path was OCR. Optical Character Recognition has been around for decades. Tesseract is open source. Google’s ML Kit has text recognition built in. Easy, right?
Wrong. Here’s what real-world water meters look like when you photograph them:
- The glass cover creates glare and reflections that obscure digits
- Meters are often dirty, dusty, or fogged up from condensation
- Lighting ranges from harsh midday sun to near-darkness in covered meter boxes
- The camera is rarely perfectly perpendicular—you’re shooting at an angle
- Some digits are half-rolled between numbers, creating ambiguous readings
- Different meter brands have completely different dial layouts
I tested Tesseract on a dozen meter photos I took around my neighborhood. It correctly read the digits in exactly two of them. The other ten? Gibberish. The OCR engine couldn’t distinguish between an 8 and a 0 when glare hit the glass just right. A partially rolled 6 looked exactly like a 5 to the algorithm.
That’s when I realized: this isn’t a text recognition problem. This is an object detection problem. Each digit on that meter is a tiny object in a noisy, unpredictable image. And object detection is what modern computer vision—specifically YOLO—excels at.
Gathering the Training Data
Machine learning models are hungry. They need data. Lots of it. And not just any data—labeled data, where every digit in every image has been marked with a bounding box and a class label.
I needed water meter images. Specifically, close-up photos of analog water meter dials showing the digit wheels. After some searching, I found several datasets on Kaggle containing roughly 1,000 water meter images from different angles, lighting conditions, and meter types. Exactly what I needed.
The images included:
- Clean, well-lit meter photos (the easy ones)
- Angled shots simulating real-world capture positions
- Low-light and shadow-heavy images
- Different meter brands with varying digit styles
- Images with reflections and dirt on the glass
This diversity was crucial. If I only trained on pristine, perfectly-lit images, the model would fall apart the moment someone pointed their phone camera at a dusty meter box in their garden at 6 PM. Real-world conditions had to be represented in the training data.
Setting Up Label Studio for Annotation
Now came the tedious part: labeling every single digit in all 1,000 images.
For annotation, I chose Label Studio—an open-source data labeling tool that you can run locally. I installed it on my laptop using their Docker setup, which took all of five minutes:
docker run -it -p 8080:8080 -v $(pwd)/mydata:/label-studio/data heartexlabs/label-studio:latestLabel Studio’s interface is clean and surprisingly quick once you get into a rhythm. I set up a new project configured for object detection with bounding boxes, defined 10 label classes (digits 0 through 9), and started importing images in batches of 100.
The labeling process itself was humbling. Here’s what I learned:
- A thousand images sounds like a lot. It’s not. It took me roughly three evenings of focused work—maybe 12 hours total—to annotate everything. And I was moving fast. Professional annotators would probably label tighter boxes than I did.
- Ambiguous digits are everywhere. A 3 that’s partially rolled looks like an 8. A 6 is indistinguishable from a 5 at certain angles. I had to make judgment calls constantly, and I know some of those calls were wrong. That’s just the reality of real-world data.
- Consistency matters more than perfection. If you label the same digit type slightly differently across images, the model gets confused. I settled on a rule: draw the tightest possible box around the visible portion of each digit, and label what it actually is, not what it’s about to become.
- Label fatigue is real. After about 200 images, your eyes glaze over. I learned to do it in 45-minute sessions with breaks in between. Quality drops off a cliff if you push through.
Label Studio exports annotations in several formats. I used the YOLO format directly—each image gets a corresponding .txt file with one line per labeled object: class_id x_center y_center width height (all normalized to 0–1). This made the transition to training seamless.
Training the Water Meter Detection Model
With the dataset labeled and organized, it was time to train. I chose Google Colab for this—their free tier gives you access to a T4 GPU, which is more than enough for a YOLO model trained on a thousand images.
Step 1: Setting Up the Environment
First, I installed the Ultralytics library in my Colab notebook. Ultralytics maintains the most developer-friendly YOLO implementation I’ve used—the API is clean, well-documented, and abstracts away most of the boilerplate.
!pip install ultralyticsThis single command pulls in everything: the YOLO model definitions, training utilities, data loaders, and export tools. No dependency hell, no CUDA configuration headaches. It just works.
Step 2: Preparing the Dataset Configuration
I created a data.yaml file that tells YOLO where to find the training and validation images and what classes to learn. Here’s what it looked like:
train: /content/dataset/train/images
val: /content/dataset/val/images

nc: 10
names: ['0', '1', '2', '3', '4', '5', '6', '7', '8', '9']
I split the 1,000 images 80/20: 800 for training, 200 for validation. The validation set is critical—it’s the model’s report card during training, showing whether it’s actually learning to recognize digits or just memorizing the training photos.
Step 3: Training the Model
The actual training code is surprisingly compact. Ultralytics handles the heavy lifting:
from ultralytics import YOLO

# Load a pretrained YOLO11 nano model
model = YOLO("yolo11n.pt")

# Train on our water meter dataset
results = model.train(
    data="data.yaml",
    epochs=100,
    imgsz=640,
    batch=16,
    device=0  # Use GPU
)
Let me walk through what each parameter means, because understanding these made a real difference in my results:
YOLO("yolo11n.pt"): I started from the nano version of YOLO11—the smallest and fastest variant. The ‘n’ stands for nano. It has about 2.6 million parameters, which makes it ideal for mobile deployment. Starting from a pretrained model (what’s called transfer learning) means it already understands basic visual features like edges, textures, and shapes. I’m not teaching it to see—I’m teaching it to see water meter digits.epochs=100: Each epoch is one complete pass through all 800 training images. I ran 100 epochs. In practice, the model stopped improving around epoch 75, and the training script automatically saved the best weights—not the last ones. This is an underrated feature that saved me from accidentally using a model that had started overfitting.imgsz=640: All images are resized to 640×640 pixels before training. This is the YOLO standard and strikes a good balance between detail and memory usage.batch=16: The model processes 16 images at a time before updating its weights. The T4 GPU in Colab handled this comfortably. Larger batches give more stable gradients but use more memory.device=0: This tells PyTorch to use the first GPU. In Colab, device 0 is the T4. Without this flag, training would crawl on the CPU.
The training took about 35 minutes on the T4. I watched the loss curves drop steadily—training loss going down, validation mAP (mean Average Precision) going up. By epoch 60, the improvement had mostly plateaued. By epoch 75, the model was done learning.
Step 4: Running Inference
Before exporting, I tested the trained model on a few fresh images to make sure it actually worked:
from ultralytics import YOLO

# Load the best weights from training
model = YOLO("runs/detect/train/weights/best.pt")

# Run inference on a test image
results = model("water_meter.jpg")

# Display the results with bounding boxes
results[0].show()
The moment those green bounding boxes appeared over every digit—correctly labeled 0 through 9—was genuinely satisfying. After hours of labeling and waiting for training to finish, seeing the model actually work on an image it had never seen before felt like magic. It’s the kind of moment that keeps you building.
Step 5: Exporting to TensorFlow Lite
The model worked great in Colab. But Colab runs on a server GPU. I needed this thing to run on a phone. That meant TensorFlow Lite.
from ultralytics import YOLO

model = YOLO("runs/detect/train/weights/best.pt")

# Export to TFLite format
model.export(format="tflite")
This single line of code is doing a lot under the hood. Ultralytics converts the PyTorch model to ONNX, optimizes the computation graph, quantizes the weights to reduce file size, and packages everything into a .tflite file ready for mobile deployment.
Why Edge AI? Why TFLite?
At this point, I could have wrapped the model in a Flask API, deployed it to a cloud server, and called it a day. Lots of people do exactly that. But I made a deliberate choice to go Edge AI—running the model entirely on-device, with no internet connection required.
Here’s why:
- Smaller model size. The exported TFLite model is under 6 MB. That’s smaller than most social media apps. It downloads once and never needs to phone home.
- Faster inference. Running on the phone’s Neural Processing Unit (NPU) or GPU means predictions happen in under 100 milliseconds. No network latency. No waiting for a server response in a spotty cellular coverage area—which, in many Philippine neighborhoods, is exactly where water meters live.
- Offline operation. Water meter readers work in basements, rural areas, and places with zero connectivity. My app works everywhere, all the time, no excuses.
- Reduced server costs. There is no server. Zero monthly cloud bills. The model runs on hardware the user already owns.
- Better user privacy. Photos of water meters—which are attached to people’s homes—never leave the device. No images uploaded to a cloud service. No privacy policy nightmares. The photo is captured, processed, and discarded entirely on the phone.
This is the promise of Edge AI, and it’s increasingly accessible to solo developers. You don’t need a data center. You need a good model, a solid export pipeline, and a mobile framework that can run it.
Integrating the Model into Flutter
I built the mobile app using Flutter—Google’s cross-platform framework that lets you ship to both Android and iOS from a single codebase. Flutter has matured significantly in the AI space, with packages like tflite_flutter making it straightforward to load and run TensorFlow Lite models.
The app has two image sources:
- Live camera capture. Using the
camerapackage, the user points their phone at the water meter and snaps a photo. I added an overlay guide—a subtle rectangular frame—to help users align the meter dial in the center of the shot. - Gallery import. For situations where someone already has a photo or wants to process an image they took earlier, the app also supports picking from the phone’s photo gallery.
Once an image is captured or selected, it’s passed to the TFLite interpreter. The model outputs bounding boxes and class predictions for every digit it detects. I wrote a small post-processing function that sorts the digits left to right based on their x-coordinates and assembles the final meter reading.
The whole flow—capture, inference, display—takes under two seconds on a mid-range Android phone from 2024. On newer devices with dedicated NPUs, it’s nearly instant.
Real-World Testing: Where It Shines and Where It Struggles
I didn’t just test this on the same clean Kaggle images I trained on. I took the app into the field—literally walking around my neighborhood, asking neighbors if I could photograph their water meters. (Try explaining that to your kapitbahay without sounding like you’re casing the place.)
Here’s what I found across different conditions:
- Bright daylight, clean meter: Near-perfect accuracy. All digits detected, all correctly classified. This is the happy path and it works beautifully.
- Moderate glare and reflections: Still solid. The model detected digits even when portions were obscured by glare—something OCR completely failed at. The bounding boxes were slightly less confident, but the classifications were correct.
- Low light and shadows: Accuracy dropped noticeably, especially with digits 3, 5, 6, and 8—the ones that look similar in poor lighting. I’d estimate about 85% accuracy in these conditions. Usable, but not bulletproof.
- Heavy dirt and fogged glass: The model struggled. Digits behind thick grime were either missed entirely or misclassified. This is the hardest case, and it’s where a larger, more diverse training set would make the biggest difference.
- Extreme angles: When the camera was tilted more than about 30 degrees from perpendicular, performance degraded. The model was trained mostly on front-facing shots, and angular perspectives introduced distortions it hadn’t seen enough of.
Overall, the AI approach outperformed OCR by a wide margin. Tesseract managed correct readings on maybe 20% of real-world photos. My YOLO model? Closer to 85–90% across all conditions. That’s the difference between a tool you can actually use and one that’s just a demo.
OCR vs. Machine Learning: A Side-by-Side Comparison
I ran a structured comparison on 50 real-world meter photos—the same set for both approaches. Here’s how they stacked up:
- OCR (Tesseract): 22% fully correct readings. The engine frequently misinterpreted digits affected by glare, partial occlusion, or angle distortion. In several cases it detected zero digits at all because the image was too “noisy” for its preprocessing pipeline.
- YOLO-based ML model: 88% fully correct readings. Most errors were single-digit misclassifications in genuinely difficult conditions—half-rolled digits or heavy grime. The model never completely whiffed on an image the way OCR did.
The takeaway isn’t that OCR is bad. OCR is great at what it was designed for: clean, flat, well-lit documents. Water meters in the real world are none of those things. Object detection models, trained on diverse real-world data, are inherently more robust to the kind of visual noise that breaks OCR.
What I’d Do Differently Next Time
Every project teaches you something. Here’s my honest post-mortem:
- I should have collected more training data. A thousand images is the bare minimum for a project like this. With 2,000–3,000 images—especially more shots from difficult angles and lighting conditions—the accuracy numbers would be significantly higher.
- Data augmentation would have helped. I could have artificially expanded my dataset by applying random rotations, brightness adjustments, and noise to existing images. YOLO does some augmentation by default, but I could have been more aggressive.
- I underestimated the labeling effort. Twelve hours of annotation is a real commitment. For future projects, I’d explore semi-automated labeling—train a rough model on 200 images, use it to pre-label the remaining 800, then manually correct the predictions. It would cut the labeling time in half.
- I should have tested on more meter brands. My dataset came mostly from two or three common meter types. When I tested on an unfamiliar meter with a slightly different digit font, accuracy dropped. Diversity in training data is everything.
What’s Next: The Roadmap
This project works. I’ve proven that to myself and to the neighbors who let me photograph their water meters. But there’s so much more to build:
- Larger, more diverse training datasets. I’m planning to collect images from at least five different meter brands across varied environments—indoor, outdoor, urban, rural. Every new data point makes the model better.
- Automatic meter cropping. Right now, the user has to frame the meter manually. I want to add a preprocessing step that detects the meter face in the image and automatically crops to the relevant area before running digit detection. Two-stage detection would dramatically improve accuracy.
- Better digit recognition for half-rolled numbers. This is the hardest problem. When a digit is between 6 and 7, the correct reading is ambiguous by definition. I’m exploring regression-based approaches that predict the exact value of each digit wheel rather than just the visible integer.
- Support for different meter brands. Each manufacturer has a slightly different dial design, digit font, and wheel configuration. A truly robust system needs to handle them all.
- Real-time video recognition. Instead of taking a photo, what if you could just point your camera at the meter and see the reading update in real time? This is technically feasible with the current TFLite model—it just needs the camera preview integration work.
- Integration with utility billing systems. The long-term vision: a meter reader captures a photo, the app processes it instantly, and the reading is submitted directly to the billing database via API. No paper. No manual data entry. No transcription errors. Just point, shoot, and it’s done.
Bottom Line
Building this app reminded me why I love software development. You start with a real problem—something as mundane as reading numbers off a water meter—and you discover it leads you through computer vision, machine learning, mobile development, and edge computing. Every layer of the stack presented its own challenges, and solving each one felt like leveling up.
OCR isn’t the answer to everything. Sometimes you need to train your own model, label your own data, and build something purpose-specific. The tools have gotten so good—Ultralytics, Label Studio, Google Colab, TensorFlow Lite, Flutter—that a solo developer can build a production-quality AI application in their spare time. That’s remarkable. That’s the era we’re living in.
If you’re thinking about building something similar—whether it’s for water meters, electric meters, gas meters, or any other specialized visual recognition task—my advice is simple: just start. The tools are ready. The learning curve is real but manageable. And the moment you see your model correctly read a number it’s never seen before? Worth every hour of labeling.
Have you worked on an Edge AI project or dealt with the limitations of OCR? I’d love to hear about your experience—drop a comment below.