
There’s a quiet revolution going on in the maker community, and it smells like hot solder and fresh 3D print. Cyberdecks — those rugged, self-contained, pocket-computer builds — are everywhere this year, and I’ve lost count of the TikTok videos of people turning purses and briefcases and old portable terminals into working machines. The trend got so big that Raspberry Pi decided to stop watching from the sidelines and just share an official build guide. This is a walkthrough of that guide, in Felix’s words, with the parts list and the exact steps.

Let me be clear about what a cyberdeck actually is, because the name carries a lot of sci-fi weight. It’s not a gaming laptop and it’s not a tablet. It’s whatever you build it to be — a wearable computer, a pocket terminal, a launch console for a high-altitude balloon, a field-testing rig, or simply a machine you made because no off-the-shelf device quite solved your problem. Raspberry Pi’s definition is the best one I’ve seen: it’s something you create to fill a need that a conventional device can’t, or just to make something personal because you feel like it.
What You Actually Need: The Four Building Blocks
Every cyberdeck, no matter how wild the case design, boils down to the same four parts: brains, peripherals, power supply, and case. Raspberry Pi organized the whole official tutorial around those, and it’s a genuinely useful way to think about a build before you spend a single peso.
1. Brains (the single-board computer)
The processing unit is the heart, and here’s where a single-board computer (SBC) shines. A Pi sips power compared to a desktop CPU, which matters when you’re running off a battery. For storage you’ve got options: SD card, USB flash drive, USB SSD, or — if you’re building on a Raspberry Pi 5 like the official guide — an M.2 NVMe drive via an M.2 HAT. The flash-drive route is worth considering because it’s faster and more robust than a microSD, plus it’s easier to swap out if you want to boot a different OS for a specific job.
2. Peripherals (how you interact with it)
Keyboard, display, mouse, speaker, camera — the standard stuff — plus the fun stuff like joysticks, trigger buttons, scroll-wheel encoders, or voice-controlled bits. A small USB hub saves you headaches when you’re plugging in several devices at once.
3. Power (do the math first)
This is the part most people get wrong, and the tutorial does you a solid by showing the actual math. Add up the power draw of every component. The Raspberry Pi 5 needs 25W at full load — that’s 5V at 5A if you’re using the USB ports at full power. The Raspberry Pi Touch Display 2 pulls about 3W at full brightness. So you need at least 28W, which works out to roughly 5.6A using the formula I = P/V. Don’t skip this step; a weak supply is the most common reason a build crashes under load.
Your supply options range from a power or UPS HAT to a DC-to-DC converter board fed by batteries, a dedicated auxiliary supply, or simply a power bank. A cyberdeck doesn’t have to run on batteries at all — mains power is fine. If you do go the LiPo route, treat it with respect: fit an inline fuse as close to the battery as possible, charge it correctly, and never let the cells over-discharge.
4. Case (this is what makes it yours)
The case defines the whole vibe. Past builds have used old pocket computers, briefcases, mint tins, wooden boxes, and prop replicas. The official guide’s starting point is a Pelican-style hard case — rugged, waterproof, usually has a carry handle. That’s a smart default because it protects the electronics and looks the part. But the only rule is that everything fits, and you should leave room for cabling.
The Official Parts List
Here’s what Raspberry Pi picked for their own build, all available off the shelf. A bit of soldering is involved (or you can cheat with Wago blocks):
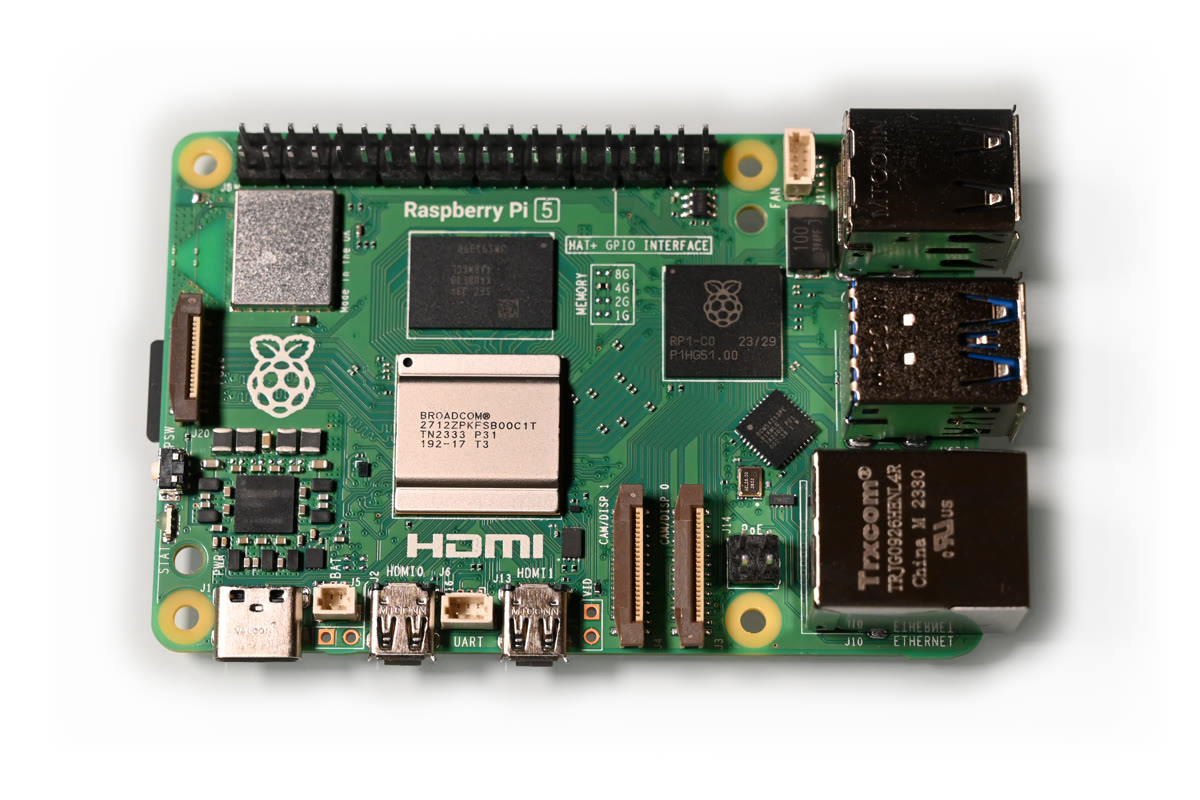
- Raspberry Pi 5 — powerful enough for everyday work and for controlling other Pi projects. It’s the board I’d grab; you can read its full spec on the official Raspberry Pi 5 product page.
- Raspberry Pi Flash Drive (128GB) — your boot storage, faster and more robust than microSD.
- Raspberry Pi Touch Display 2 (7-inch) — 1280×720 landscape, and the touchscreen mostly kills the need for a mouse.
- Rii RK302 Bluetooth keyboard — chosen because it’s low-profile and fits inside the case.
- Pimoroni Picade Max USB Audio — a compact USB-C sound card with a 3W stereo amplifier, plus the Picade Max Encoder for volume control.
- Power — a power bank if you want it simple, or a LiPo battery with an inline fuse and a DC-to-DC converter (5V at 5A via USB-C PD) if you want it portable and custom.
- Pelican-style hard case
- Raspberry Pi RTC Battery — adding this activates the Pi 5’s built-in real-time clock so it keeps time when off-grid.
One config tweak worth noting: to let the RTC battery charge, add this line to /boot/firmware/config.txt:
dtparam=rtc_bbat_vchg=3000000
For internal cabling, the guide recommends flat, customizable ribbon-style USB cables — you can mix the ends, like a right-angle micro HDMI to a full-sized HDMI plug. A 500mm display ribbon cable connects the screen.
Build It Step by Step
Here’s the sequence from the official tutorial, and it’s the part I found most interesting because it’s so methodical.
Software first
Burn your chosen OS to your storage device before you start assembling anything. Raspberry Pi Imager makes this painless. Test the bare hardware — Pi, display, keyboard — before you put a single screw into the case. Trust me, troubleshooting a blank screen is ten times easier when the board is on your desk and not buried inside a case.
Prototype the layout
Raspberry Pi’s tip here made me smile: do the design in CAD — Cardboard-Aided Design. Lay out the parts on plain cardboard first to see how it all fits and how much room your cabling needs. You’ll learn more in one afternoon shuffling parts on cardboard than an hour staring at a modeling screen.
Model and make
Once the layout is settled, translate it into real CAD models. The guide used SOLIDWORKS Maker, but Fusion360 or the open-source FreeCAD work just as well. Then print or laser-cut your supports and panels. Budget for adjustments — you will make changes as you build, and that’s normal, not a failure.
Assemble from the lid down
The assembly order matters. Start with the lid and verify the parts fit. Install the speakers and the Picade Max audio behind the display, run the volume control out through the front plate, then fit the display into the top plate with double-sided tape or foam before adding the back brackets.
Glue the supports in with hot glue or foam tape — but only after you’ve checked the fit a second time. Wire up the speakers, connect the 500mm ribbon cable, and extend the display’s power cable (the guide solders a USB-A plug to it and covers the joints with heat-shrink, which frees the GPIO power pins for other projects). Self-tapping screws secure the display panel to the supports.
Fit the Pi and finish
With the display and speakers confirmed working, fix the Raspberry Pi into place with glue or Velcro — the guide designed a dedicated mount plate with a battery holder. Then add the keyboard grips. Here’s a clever detail: don’t fix the keyboard plate down permanently. You’ll want to access the Pi to power it on and off and swap power sources, and a removable plate makes that trivial.
Where to Take It From Here
Once the basic build is done, the ceiling is your imagination. Hook up a Raspberry Pi Pico as a second processor to drive a smaller secondary display or a bank of LEDs — and let’s be honest, you can never have too many LEDs in a build. Add sensors to monitor power draw and keep an eye on your battery level so you never hit an over-discharge surprise.
And the whole thing nails the spirit of why I run self-hosted tools in the first place. A cyberdeck is the ultimate portable expression of owning your hardware — the same impulse that has me running a self-hosted photo library and my own DNS infrastructure. When the grid or the cloud connection drops, these are the machines that still work.
If you want the deeper dive, Raspberry Pi published this build in the cyberdeck special of Raspberry Pi Official Magazine #168, which you can read online for free. And if moving files between your new deck and your main machine feels awkward, I’ve covered a clean way to do that with croc before.
Bottom line? The best part of a cyberdeck isn’t the spec sheet — it’s that you built it. You chose the case, the power, the keyboard, the extra bits that make it yours. In a world of identical machines in identical trays, there’s something quietly rebellious about carrying around a computer no one else has. That’s worth the soldering.